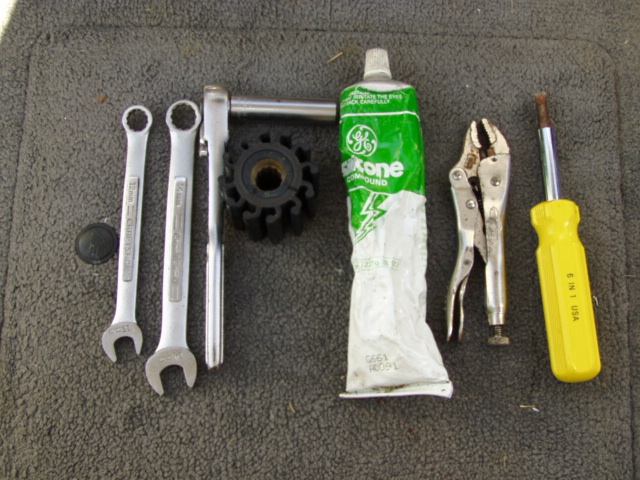
I also replaced my impeller. Here is how I did it. You need:
- 12 mm and 14 mm box end wrenches
- 12mm deep socket and ratchet
- Flat blade screwdriver
- Pliers to pull out old impeller, I used small vice grips
- New impeller, Johnson 812 (Indmar)
- Silicon LUBE (not caulk!) or dish soap

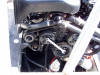
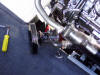
First, remove the belt. Use a 14mm wrench and turn the tensioner
counterclockwise with one hand while slipping the belt off with the other. I
always take a picture like this one with my digital camera before I take
something apart so I can see details such as how the belt was routed.
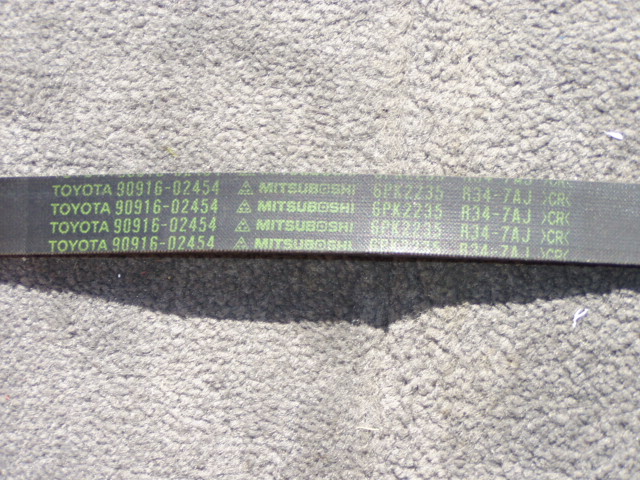
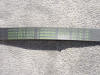
Here is the part number to the belt, often the numbers are destroyed when the
belt fails, so this is a just in case thing. Notice it has a Mitsubishi part
number on it as well, it probably fits a number of vehicles. This part should be
available for a while.
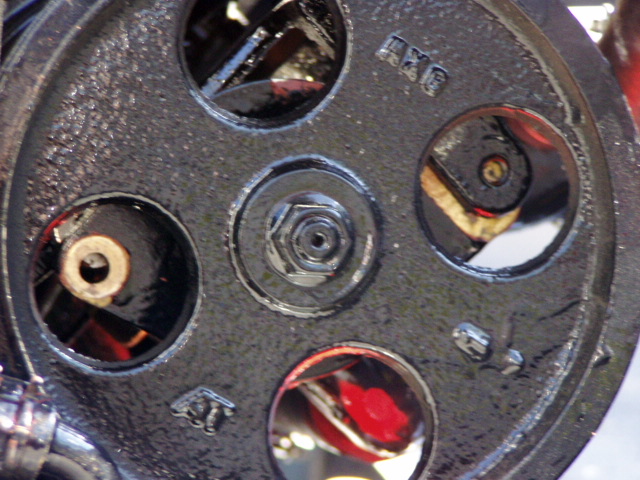
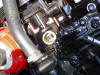
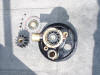
Remove the outlet hose from the water pump. The pump is on the lower right
side of the engine and has a large flywheel with four holes in it. This picture
shows the view inside the pump from the outlet hose, you can look down here to
inspect the condition of the impeller. Loosen the clamp on the inlet hose, you
can't actually pull the hose until the pump is loose.
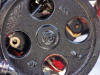
There are three 12mm bolts that hold the pump to the brackets that secure it
to the engine. Two of them can be accessed through the holes in the flywheel.
Use a ratchet and a short extension or a deepwell socket like I did. The bolts
have been removed and the pump is loose in this picure.
The third bolt is underneath the pump and is oriented perpendicular to the
keel, it bolts the body of the pump to an odd looking bracket. I couldn't get my
camera in for a picture. There are several other bolts that secure the bracket
to the engine, take a good look around the pump and only remove the three
necessary to remove the pump.
When you have removed all three bolts, twist the pump downwards and away from
the engine to break the seal on the inlet hose. Remove the pump.
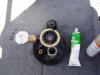
There are four screws on the back of the pump, remove them and the cover
plate. There is an arrow on the cover plate that tells you the direction of
rotation of the pump. The impeller is offset inside the pump body. There is a
rubber O ring that seals the back cover, it can be reused if not damaged.
Using a pair of pliers and extreme caution not to scratch or otherwise damage
the pump body, pull the impeller out. If you scratch the inside of the pump, it
will eat $37 impellers. Polish the scratch with emery cloth with a little oil.

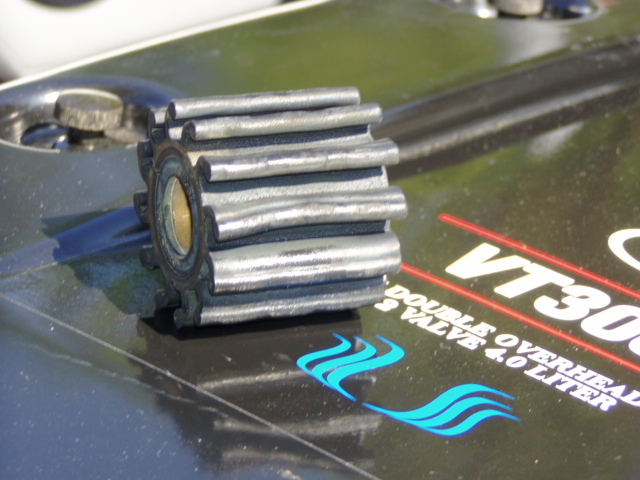
Here is what my impeller looked like after 387 hours. I was definitely on
borrowed time!

Lubricate the new impeller with silicone or dish soap. Gently push the new
impeller in, rotating the pump clockwise (front) to get the vanes to bend the
same way as the old one. Lube the O ring as well.
Reinstall the cover plate, it only fits one way as the screw holes are
offset. Reinstall the pump, tighten the hoses and reinstall the belt. Go
Wakeboarding!
|